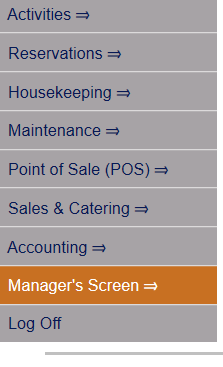
From the Full Menu => Other section, click Manager's Screen.
Click the icon on the left for the Full Menu.
![]()
This will display the Full menu in a tabular form, with four sections, Registration, Status, Cashier and Other.
Select Other from the Other section.
This will take you to the Other Front Desk Tasks menu, which has four sections, Other List 1, Other List 2, Documents and Web.
Select Manager's Screen to be taken to the Manager's Command screen.
OR:
Select Manager's Screen from the Quick Menu on the left side of the screen, to be taken to the Manager's Command screen.
The Manager's Command screen menu has two sections, Manager's Configuration and Manager's Maintenance.
Select Web Amenity Groupings from the Manager's Configuration section.
When selected the Web Amenity Groupings screen will open.
The screen display is split into two frames, with the left side of the screen listing any already configured Web Amenity Groupings for the Property and the right side containing the fields you need to complete in order to add or edit a Web Amenity Grouping for the Property. Any changes made on the right, once saved, will be updated in the listings to the left.
The currently configured options are displayed by:
Order: List Order of the Web Amenity Grouping. If there is no list order number, the Web Amenity groupings will be displayed alphabetically.
Name: Name of the Web Amenity Grouping.
Selecting any Web Amenity Grouping on the left will display the details on the right.
Your options include the following:
Generate a new entry:
Click the New ![]() button from the toolbar to add a new Web Amenity Grouping.
button from the toolbar to add a new Web Amenity Grouping.
Complete the fields described below.
OR:
Select an existing Web Amenity Grouping from the list on the left, and click the Replicate ![]() button from the toolbar. Then change the field information as described below.
button from the toolbar. Then change the field information as described below.
Edit the current selection:
Change the field information described below.
List Order: List Order of the Web Amenity Groupings.
This feature is optional. If there is no list order number, the Web Amenity Groupings will be displayed alphabetically.
Description: Enter the actual name of the Web Amenity Grouping or how you wish to refer to it in this field.
This field is required.
When you are finished adding or editing a Web Amenity Grouping, click the Save ![]() button to save the changes.
button to save the changes.
To view any changes made, click the Activity log ![]() button in the local tool bar.
button in the local tool bar.


